Blurry images can be frustrating. You take a photo, download an image, or scan an old picture, and when you open it later, the details just aren’t clear. Text looks soft, faces lose definition, and important parts become hard to see. This is exactly why so many people search for how to unblur an image in their daily work and life.
In 2026, unblurring an image no longer requires professional editing skills or complex software. With modern online image enhancement tools, you can restore clarity, improve details, and make images usable again in just a few simple steps. This guide will walk you through how to unblur an image in a clear, practical way, explain why images become blurry, and show you how to get natural-looking results without over-editing.
What Does It Mean to Unblur an Image
To unblur an image means making it clearer so important details are easier to see. This usually includes sharper edges, better contrast, and more visible textures. When an image is unblurred properly, it looks cleaner and more readable, but still natural.
Unblurring does not mean inventing new details that were never there. Instead, it works by strengthening the visual information that already exists in the image. Most modern unblurring methods analyze patterns such as lines, edges, and shapes, then reduce the softness caused by blur.
For example, if a photo looks slightly soft, unblurring can make text easier to read, faces more defined, and objects more recognizable. When you learn how to unblur an image, the goal is not perfection—it is clarity. A good result should look like a better version of the original image, not an over-edited one.
Why Images Become Blurry
Images become blurry for different reasons, and each type of blur behaves differently. Understanding the cause helps you choose the right way to unblur an image and avoid unrealistic expectations.
Camera Shake and Motion Blur
Camera shake happens when your hands move slightly while taking a photo. Motion blur happens when the subject moves during the shot. Both are very common, especially in low-light situations.
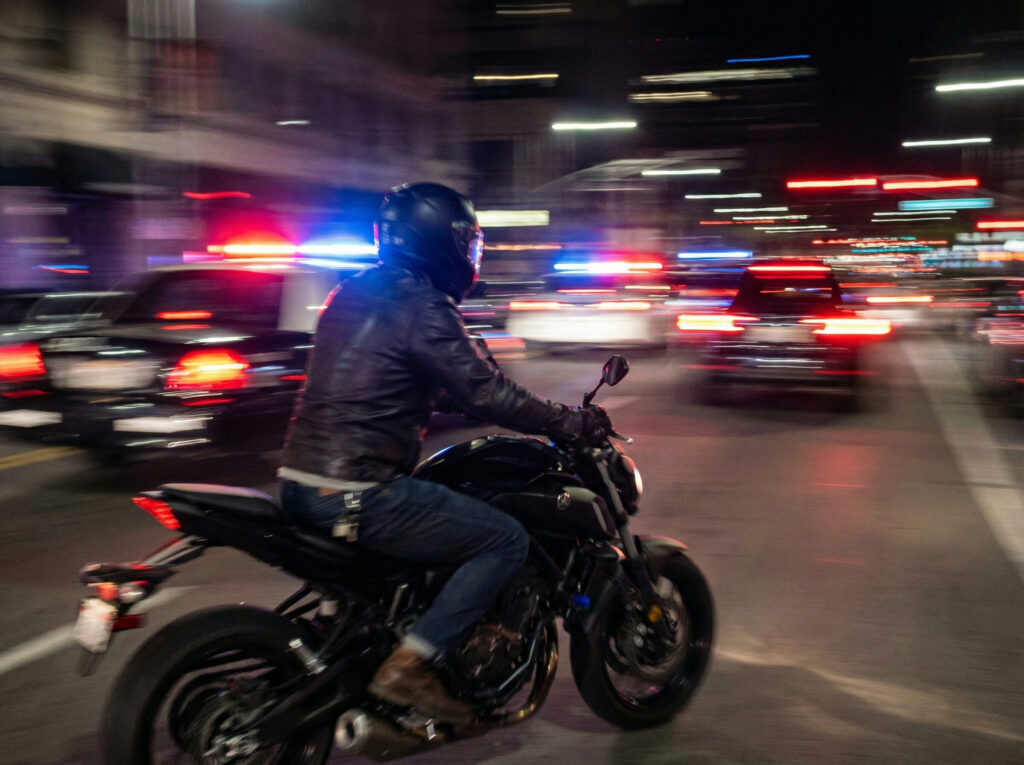
For example, photos taken indoors at night or during events often look blurry because the camera needs more time to capture light. Even small movements can cause blur. This type of blur usually affects the entire image or creates streaks along the direction of movement.
When learning how to unblur an image with motion blur, it’s important to know that results depend on how strong the movement was. Mild motion blur can often be reduced, while heavy blur has natural limits.
Out-of-Focus Photos
Out-of-focus blur happens when the camera focuses on the wrong object or fails to focus at all. This is common in fast snapshots, close-up shots, or photos taken in a hurry.
You might notice that the background looks sharp, but the main subject looks soft. Faces, text, or products often suffer from this problem. Unlike motion blur, out-of-focus blur usually makes edges look smooth instead of stretched.
This type of blur is one of the most common reasons people search for how to unblur an image, because it often affects important details while the rest of the photo looks fine.
Low Resolution or Compression Artifacts
Low resolution blur happens when an image is too small or heavily compressed. This is very common with images downloaded from social media, messaging apps, or websites.
Compression removes fine details to reduce file size. As a result, images may look soft, pixelated, or unclear when zoomed in. Text becomes hard to read, and edges lose definition.
This type of blur is not caused by the camera, but by how the image was saved or shared. When you want to unblur these images, the focus is on restoring clarity and reducing compression artifacts rather than sharpening aggressively.
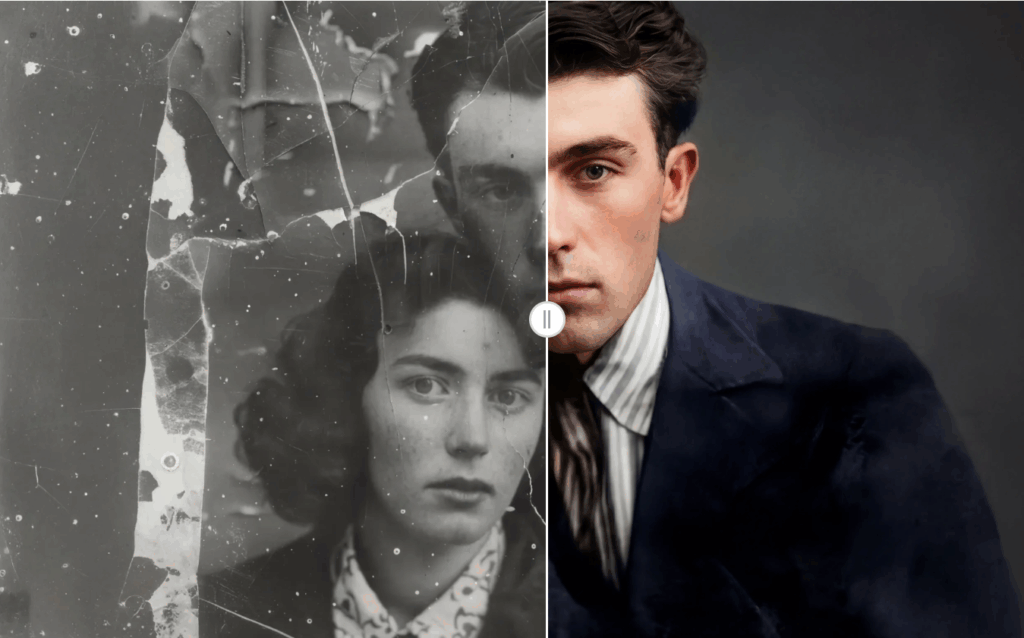
Blurry Scanned or Old Photos
Old photos and scanned images often look blurry for different reasons. The original photo may have aged, the scan resolution may be low, or the lighting during scanning may be uneven.
These images often have soft edges, faded contrast, and a lack of detail. Unblurring old photos requires a gentle approach. The goal is to improve clarity while keeping the original look and feeling of the image.
This is a common use case for people learning how to unblur an image, especially when working with family photos, historical images, or printed documents.
How to Unblur an Image
If you’re looking for a simple and practical way to learn how to unblur an image, using an online tool is the easiest starting point. You don’t need editing experience, and you don’t need to install any software. The entire process can be done directly in your browser.
Below is a clear, step-by-step guide that shows how image unblurring works in real use. Each step is designed to be straightforward, even if you’ve never edited an image before.
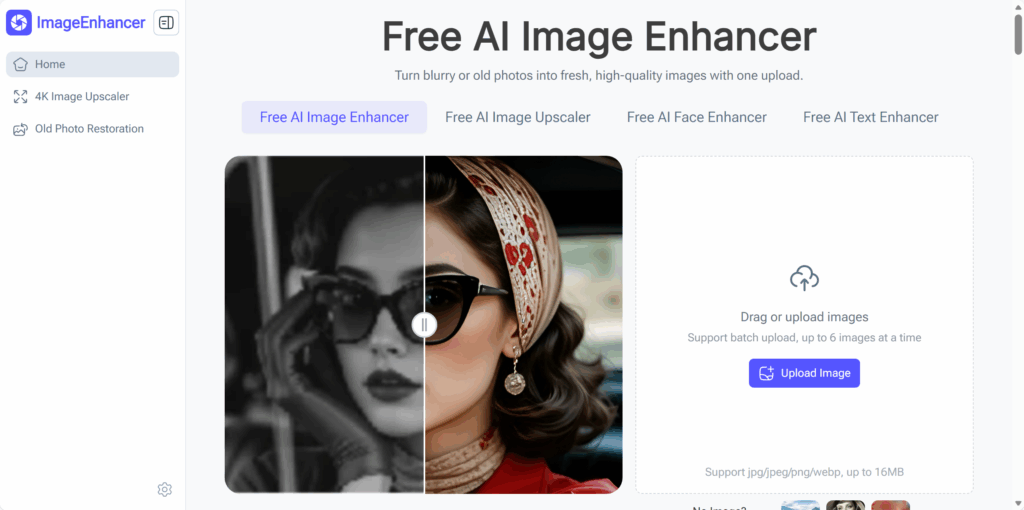
Step 1 – Upload Your Image
Start by opening ImageEnhancer and uploading the image you want to fix. You can upload photos, screenshots, scanned documents, or old images directly from your device.
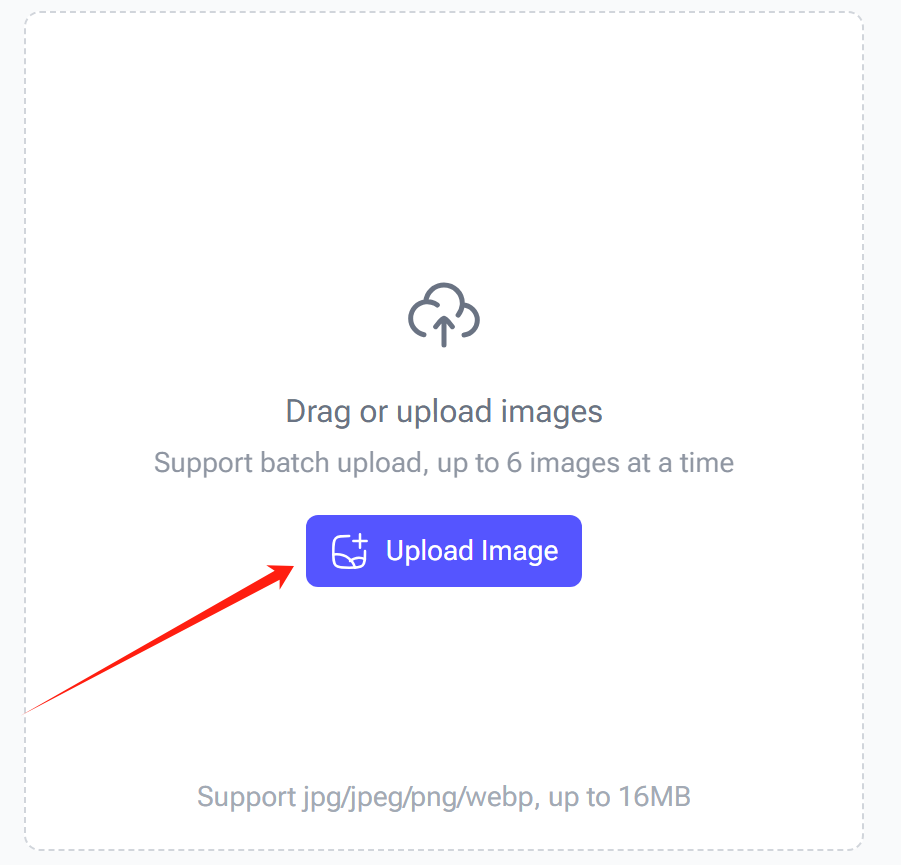
There’s no need to prepare the image in advance. You don’t have to resize it, crop it, or adjust any settings before uploading. Using the original file usually gives the best results because it contains more visual information to work with.
This step is where your unblurring process begins, so choosing the clearest version of the image you have is always a good idea.
Step 2 – Automatically Reduce Blur
After uploading, the system automatically analyzes your image. It looks at edge softness, noise, contrast, and the overall structure of the photo to understand what kind of blur is present.
You don’t need to select blur types or tweak technical options. The tool handles this step for you, which makes it especially useful if you’re learning how to unblur an image for the first time.
This automatic process helps avoid common mistakes like over-sharpening or applying the wrong type of correction.
Step 3 – Enhance Clarity and Image Details
Once the blur is reduced, the tool focuses on improving clarity and details. This includes sharpening edges, improving contrast, and reducing visual noise in a balanced way.
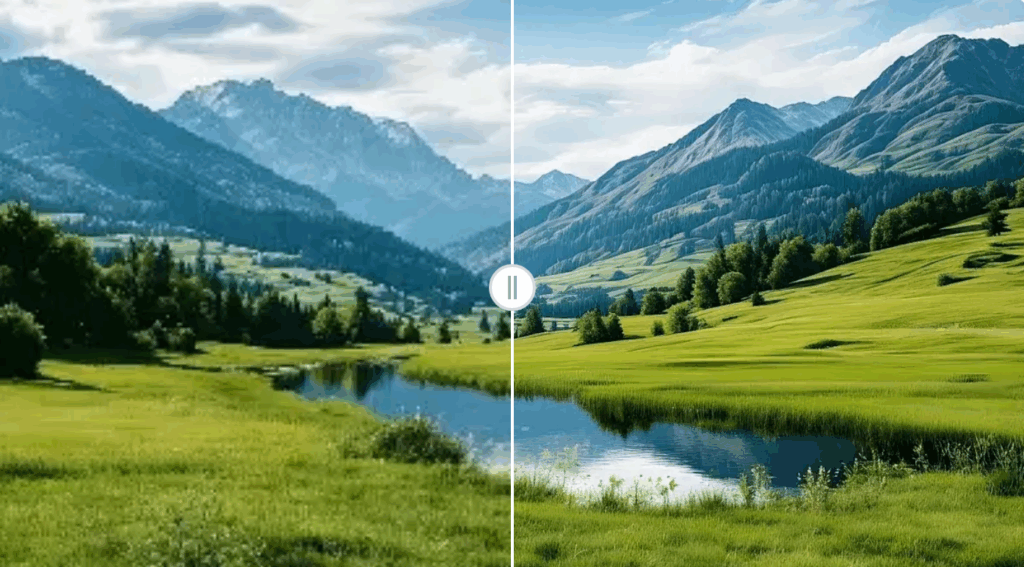
Text becomes easier to read, facial features look more defined, and objects stand out more clearly. The goal here is not to make the image look “sharp at all costs,” but to make it look clean and natural.
A good unblurred image should feel like a clearer version of the original, not something heavily edited.
Step 4 – Download the Unblurred Image
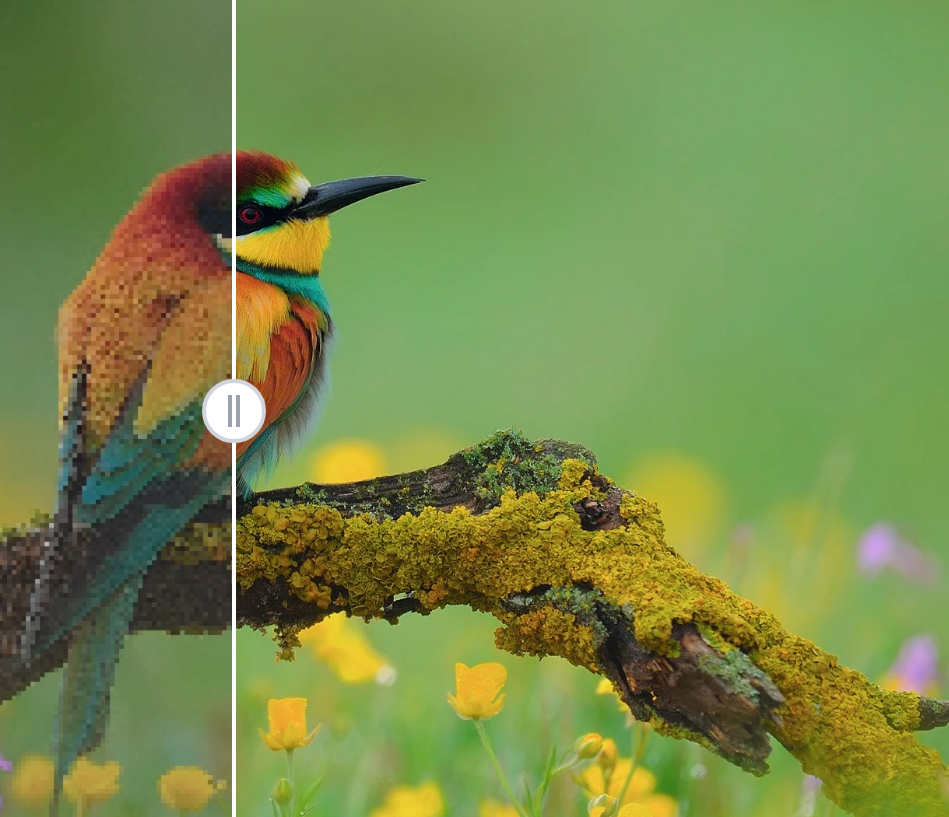
After processing, you can preview the result and compare it with the original image. If the details look clearer and the image feels more usable, you can download the unblurred version in high quality.
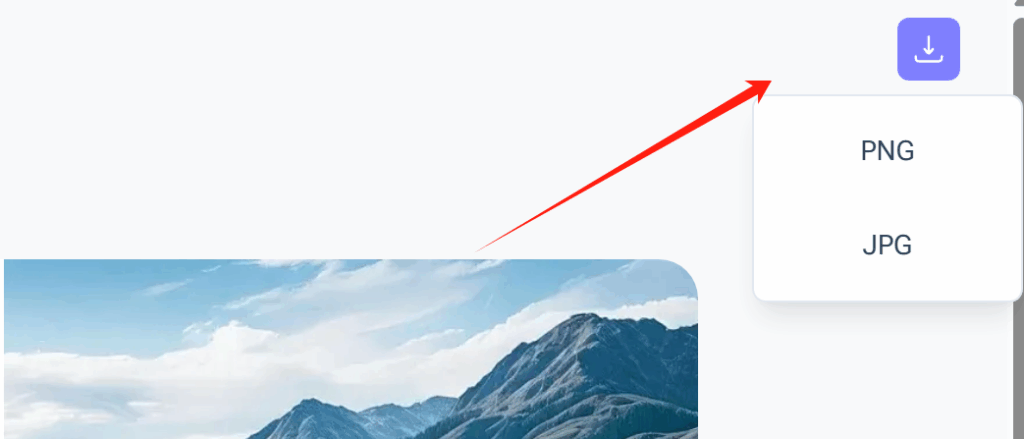
At this point, your image is ready to use—for documents, presentations, social media, or personal storage. The entire process usually takes only a few minutes from start to finish.
This step completes the full workflow of how to unblur an image using an online solution.
Why Use ImageEnhancer to Unblur an Image
When it comes to unblurring images, not all tools are created equal. ImageEnhancer stands out for several reasons, making it a reliable choice whether you want to fix a quick screenshot, an old family photo, or a blurry document. Here’s why you might choose it:
No Photoshop or Editing Skills Needed
You don’t need to know Photoshop, Lightroom, or any complicated editing software. It works automatically in your browser. You simply upload your image, and the tool detects blur and restores clarity for you.
This is especially helpful if you’re learning how to unblur an image for the first time, or if you just want a quick solution without spending hours on tutorials.
Fast Online Image Unblurring
Speed matters, especially when you have multiple images to fix. ImageEnhancer processes images in seconds, giving you immediate results.
Whether you’re on your computer or mobile device, you can enhance images quickly and continue with your work, social media posts, or presentations without delay.
Works for Photos, Screenshots, and Old Images
One of the best things is its versatility. It doesn’t matter if your image comes from a phone camera, a scanned document, or even an old photo. The tool adjusts its processing based on the type of image and the kind of blur, giving consistently good results across different scenarios.
This flexibility makes it a go-to option for anyone learning how to unblur an image, regardless of the source.
Free and Easy to Access Online
ImageEnhancer is free to use and works directly in your browser. There’s no installation, subscription, or hidden setup required. This makes it easy to try, test, and use as often as you need, whether for personal projects or professional tasks.
Because of this accessibility, anyone can improve image clarity in just a few clicks, which is exactly what makes learning how to unblur an image approachable for everyone.
Tips to Get Better Results When You Unblur an Image
Even with a powerful tool, following a few simple tips can make a big difference when learning how to unblur an image. Applying these suggestions can help you get sharper, more natural-looking results while keeping the image realistic and readable.
Start With the Best Image Quality Possible
Always start with the highest-resolution version of your image. The more detail the original file has, the better ImageEnhancer can restore clarity. For example, a full-size photo or a high-resolution scan will produce far better results than a tiny, compressed screenshot. When you know how to unblur an image, starting with quality input is the first key step to success.
Avoid Over-Sharpening
It’s tempting to push clarity to the maximum, but too much sharpening can create unnatural edges or halos. Gentle enhancement works best, keeping images natural while restoring detail. This is especially important if you are trying to learn how to unblur an image for faces, text, or landscape details—subtle improvements often look better than aggressive corrections.
Understand the Limits of Image Unblurring
Even the best tools can’t recover details that were never captured. If your image is extremely blurry or heavily compressed, you might see limited improvement. Knowing this helps set realistic expectations. Understanding these limits is a core part of learning how to unblur an image effectively, so you know what results are possible and what isn’t.
When ImageEnhancer Works Best
ImageEnhancer performs best on images with mild to medium blur, low-resolution images with clear structures, or scanned photos and screenshots. Strong motion blur or very soft-focus images may still improve, but the effect will be partial. Recognizing the situations where the tool shines is another essential tip when mastering how to unblur an image.
Common Mistakes When Trying to Unblur an Image
Even with a tool, people often make avoidable mistakes that reduce the quality of the final result. Knowing these common pitfalls can help you achieve better clarity when learning how to unblur an image.
- Using extremely low-quality images – Very tiny or heavily compressed images have little detail to restore. Starting with better-quality originals always improves results.
- Over-sharpening – Pushing clarity too far can create unnatural edges or halos. Gentle adjustments usually look more realistic.
- Expecting perfection – Tools can improve readability and definition, but they can’t create details that never existed. Knowing the limits prevents frustration.
- Ignoring blur types – Different blurs (motion, out-of-focus, or compression) respond differently to processing. Understanding what kind of blur your image has helps you get better results.
- Skipping preview and comparison – Always check the processed image against the original. This helps you avoid over-editing and ensures the improvement meets your needs.
Keeping these mistakes in mind ensures your workflow is smooth and your results look natural.
FAQs about How to Unblur an Image
Here are some common questions about how to unblur an image using ImageEnhancer:
How to unblur an image online?
Simply visit ImageEnhancer, upload your image, and let the tool automatically reduce blur. You can then enhance clarity and download the result in just a few clicks.
Can it fix very blurry images?
It depends on the severity of the blur. Mild to medium blur can usually be fixed very well, while extremely blurry images may improve only partially. The tool works best on images that still contain some visible detail.
Is free to use?
Yes! ImageEnhancer works entirely online and is free to use. You don’t need any subscription or installation, making it quick and convenient for anyone wanting to restore image clarity.
Do I need Photoshop to unblur an image?
No. It eliminates the need for complex software like Photoshop. You don’t need any editing skills—just upload your image and follow the simple steps.
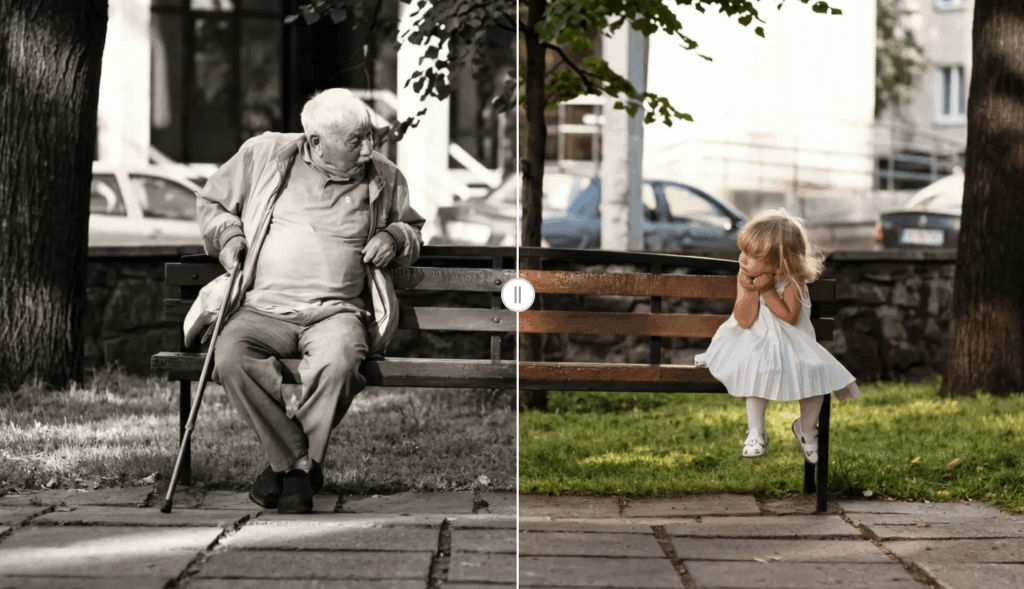
Can unblur old or scanned photos?
Absolutely. ImageEnhancer works on scanned images, old family photos, and printed documents. It carefully enhances details while keeping the original look intact, making it perfect for preserving memories or improving archival material.
Conclusion
Blurry images don’t have to be frustrating. Learning how to unblur an image can help you restore clarity in photos, scanned documents, or old family pictures.
ImageEnhancer makes this easy—upload your image, reduce blur, enhance details, and download a cleaner version, all without any editing skills. By starting with good-quality images and avoiding over-sharpening, you can get natural, clear results every time.
With these tips and steps, improving your blurry images is simple, practical, and fast.